lundi 29 avril 2013

Cache et perfomances SharePoint 2013

Plan for caching and performance in SharePoint Server 2013

Learn about the BLOB cache, Bit Rate Throttling, and other SharePoint features that can improve browser performance.

For a publishing site for which most of the visitors are anonymous or where most of the files are static content, enable the BLOB cache for as many file types as possible.

Using BLOB cache in a high traffic environment, and if you will use ULS logging, consider placing the BLOB cache on a separate physical drive from the ULS log — not on a separate partition. Storing the BLOB cache and the ULS log on the same drive can result in poor server performance.

Each front-end web server has its own local copy of the BLOB cache that is built as requests for files are received. If you use load balancing with multiple front-end web servers, each server contains its own cache.

By default, the BLOB cache is set to 10 gigabytes (GB). Allow at least 20 percent more space on the drive than the size of the cache. For example, if you have 100 GB of content, set the size of the cache to 120 GB on a drive that has at least 150 GB of space. If the BLOB cache is too small, serving files to users slows, reducing the performance of your site.

http://technet.microsoft.com/en-us/library/ee424404.aspx

Cache settings operations in SharePoint Server 2013

Learn about the available caches and the settings that can be configured for the BLOB cache, cache profiles and object cache settings.

http://technet.microsoft.com/en-us/library/cc261797.aspx

Monitor cache performance in SharePoint 2013

Learn how to monitor the SharePoint BLOB cache, the ASP.NET output cache, and the SharePoint object cache.

http://technet.microsoft.com/en-us/library/ff934623.aspx

Configure cache settings for a web application in SharePoint Server 2013

Learn how to configure the BLOB cache, page output cache profiles, and the object cache for a web application.

http://technet.microsoft.com/en-us/library/cc770229.aspx

Create a Data Collector Set to Monitor Performance Counters

You can create a custom Data Collector Set containing performance counters and configure alert activities based on the performance counters exceeding or dropping below limits you define.

http://technet.microsoft.com/en-us/library/cc722414.aspx

mardi 23 avril 2013

Premiers pas sur Office 365 et SharePoint 2013 Online

Création de votre site

Une offre d'essai permet de créer un compte sur Office 365 pendant 30 jours, tout ce qu'il vous suffit c'est une adresse mail Microsoft (hotmail /outlook /live).

http://msdn.microsoft.com/fr-fr/library/fp179924.aspx#o365_signup


Une fois votre compte créé il ne reste plus qu'à vous rendre sur votre portail avec le compte créé ( @onmicrosoft.com)


Votre première application

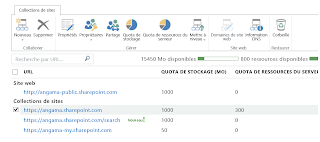
Commençons par nous rendre sur l'administration SharePoint


Rendez-vous ensuite sur la première collection de sites SharePoint 2013 online créée par défaut dont l'URL est https://angama.sharepoint.com dans mon cas puisque mon domaine est 'angama'

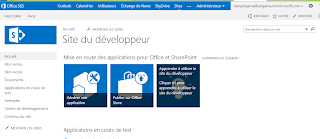
Vous voici donc sur votre site SharePoint 2013 dédié au développement d'application.

Nous allons nous intéresser en premier lieu à l'ajout d'application à votre portail et plus particulièrement aux liste de tâches.
Dans la partie paramètres située en haut à droite de votre site cliquez sur "Ajouter une application".


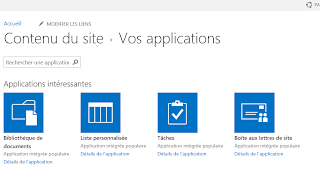
Une fois dans la galerie des applications, cliquez sur le modèle de liste "Tâches" et nommez votre liste "Planning".


Une fois la liste créée vous vous retrouvez sur la page "Contenu de site" avec la liste "Planning" correctement créée.
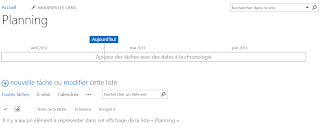
La prochaine étape consistera à populer cette liste et modifier l'affichage de celle-ci.

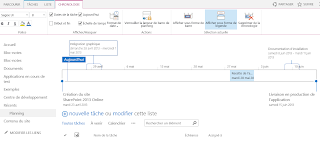
Ajoutez du contenu à la liste en vous servant du formulaire d'ajout et ajoutez les tâches à la vue chronologique.


Nous allons maintenant ajouter cette vue à la page principale de notre site, revenez à la page d'accueil du site en cliquant sur le logo SharePoint 2013 en haut à gauche de la page.

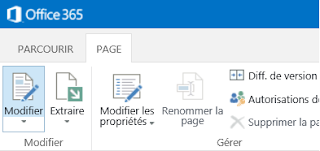
Cliquez ensuite sur "Page" et enfin sur "Modifer la page".


 Depuis l'onglet "Insérer" cliquez sur "Composant WebPart", il vous suffit maintenant de chercher l'application correspondant à la liste "Planning" et de l'ajouter à la page.

Voici le résultat final en ajoutant à gauche la WebPart Planning et sur la droite cette même WebPart en filtrant les résultats sur "Mes tâches".


Libre à vous de modifier l'affichage de la page notamment en changeant le thème de votre de site et en le renommant.

Le prochain tutoriel portera sur la navigation grâce au magasin des termes, les URL conviviales et le SEO (search engine optimization).